Configure Webhook in Splunk Enterprise
After configuring the webhook for Splunk Enterprise in Collaborate, you can add this webhook to any alert Splunk Enterprise.
Before you Start
Ensure that you have generated the webhook for Splunk Enterprise in Integrations. For more information about generating the webhook URL, see Configure Detect Integrations.
Steps
To configure the webhook in Splunk Enterprise, follow these steps:
In Splunk Enterprise, go to Search & Reporting.
Go to Alerts, and select the alert to which you want to add the webhook.
(Optional) Alternatively, you can create alerts by searching for the data type for which you want an alert and clicking Go. An example of a search query that looks for the specific use of reg.exe in correlation to commands aimed at disabling user account control (UAC) is as follows:
sourcetype = __your_sysmon_index__ ParentImage = "C:\\Windows\\System32\\cmd.exe" | where like(CommandLine,"reg.exe%HKLM\\SOFTWARE\\Microsoft\\Windows\\CurrentVersion\\Policies\\System%REG_DWORD /d 0%")
To save this data type as an alert, click Save As, and then select Alert from the dropdown.
In Actions, click Edit.
Click Add Actions, and from the dropdown, select Webhook.
Note
It is recommended to select the trigger For each result.
In Webhook, enter the webhook that you configured in Collaborate and click Save. To view the alert you created, go to the Alerts section.
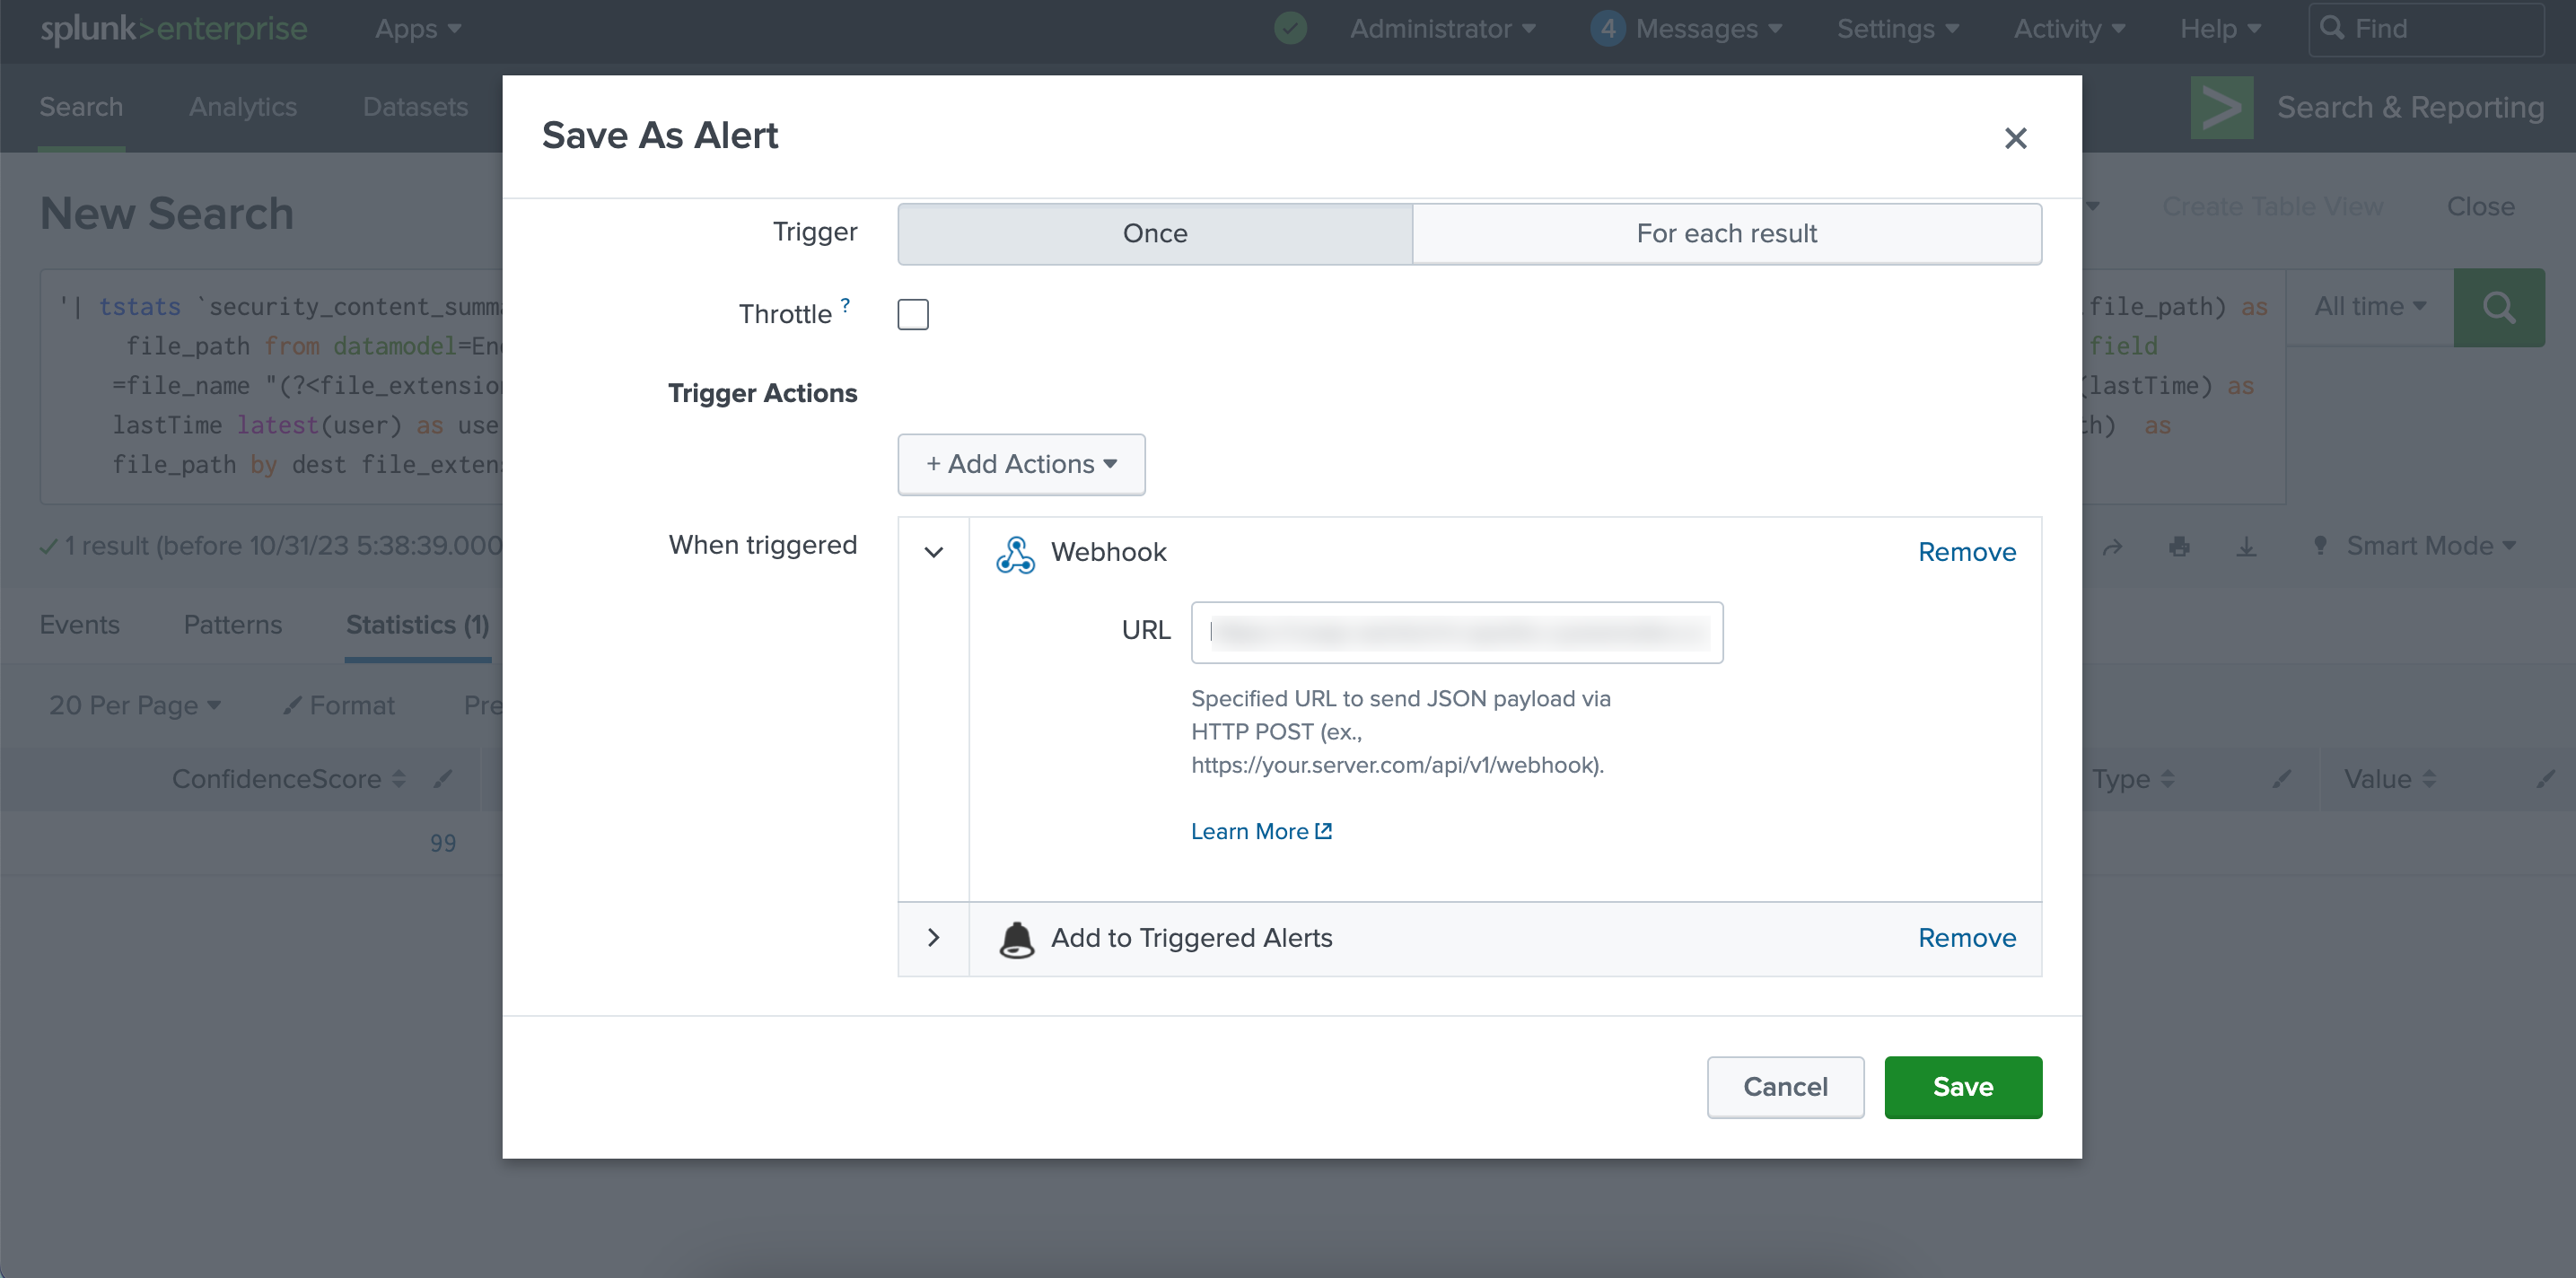
Additionally, to maintain a log of all the data that is sent to ACD, select Add To Triggered Alerts action from the Add Actions dropdown.
Results
After the webhook is successfully added to the alert, you will start receiving indicators in Automated Collective Defense > Intel Repository > My Collection whenever the alert is triggered.