Configure Webhook in IBM QRadar
After generating the webhook for IBM QRadar in Collaborate, you can add this webhook to your preferred action in IBM QRadar.
Before you Start
Ensure that you have generated the webhook for IBM QRadar in Integrations. For more information about generating the webhook URL, see Configure Detect Integrations.
In IBM QRadar, go to Admin > Custom Actions.
In Custom Actions, click Define Actions.
To add a custom action, click Add.
In Basic Information, enter the name and description of the action.
In the Script Configuration, select the interpreter as Python. Create a .py file from the following Python script and upload it in the Script File:
#!/usr/bin/python
import sys
import requests
import datetime

event_id = sys.argv[1]
title = sys.argv[2]
summary = sys.argv[3]
severity = sys.argv[4]
source_ip = sys.argv[5]
category = sys.argv[6]
url = sys.argv[7]
event_time = sys.argv[8]

placeholder_title = 'Source IP ({source_ip}) seen with Event Severity ({severity})'.format(source_ip=source_ip, severity=severity)
placeholder_description = "Source IP ({source_ip}) seen with Event Severity ({severity}) with the event category ({category}) at {event_time}".format(source_ip=source_ip, severity=severity, category=category, event_time=event_time)

if not title or title == 'null':
    title = placeholder_title
if not summary or summary == 'null':
    summary = placeholder_description

payload_json = {
    "sourceip": source_ip,
    "id": event_id,
    "name": title,
    "eventType": category,
    "severity": severity,
    "description": summary,
    "eventTime": event_time
}
headers = {
    'Content-Type': 'application/json'
}

response = requests.post(url, verify=False, json=payload_json, headers=headers)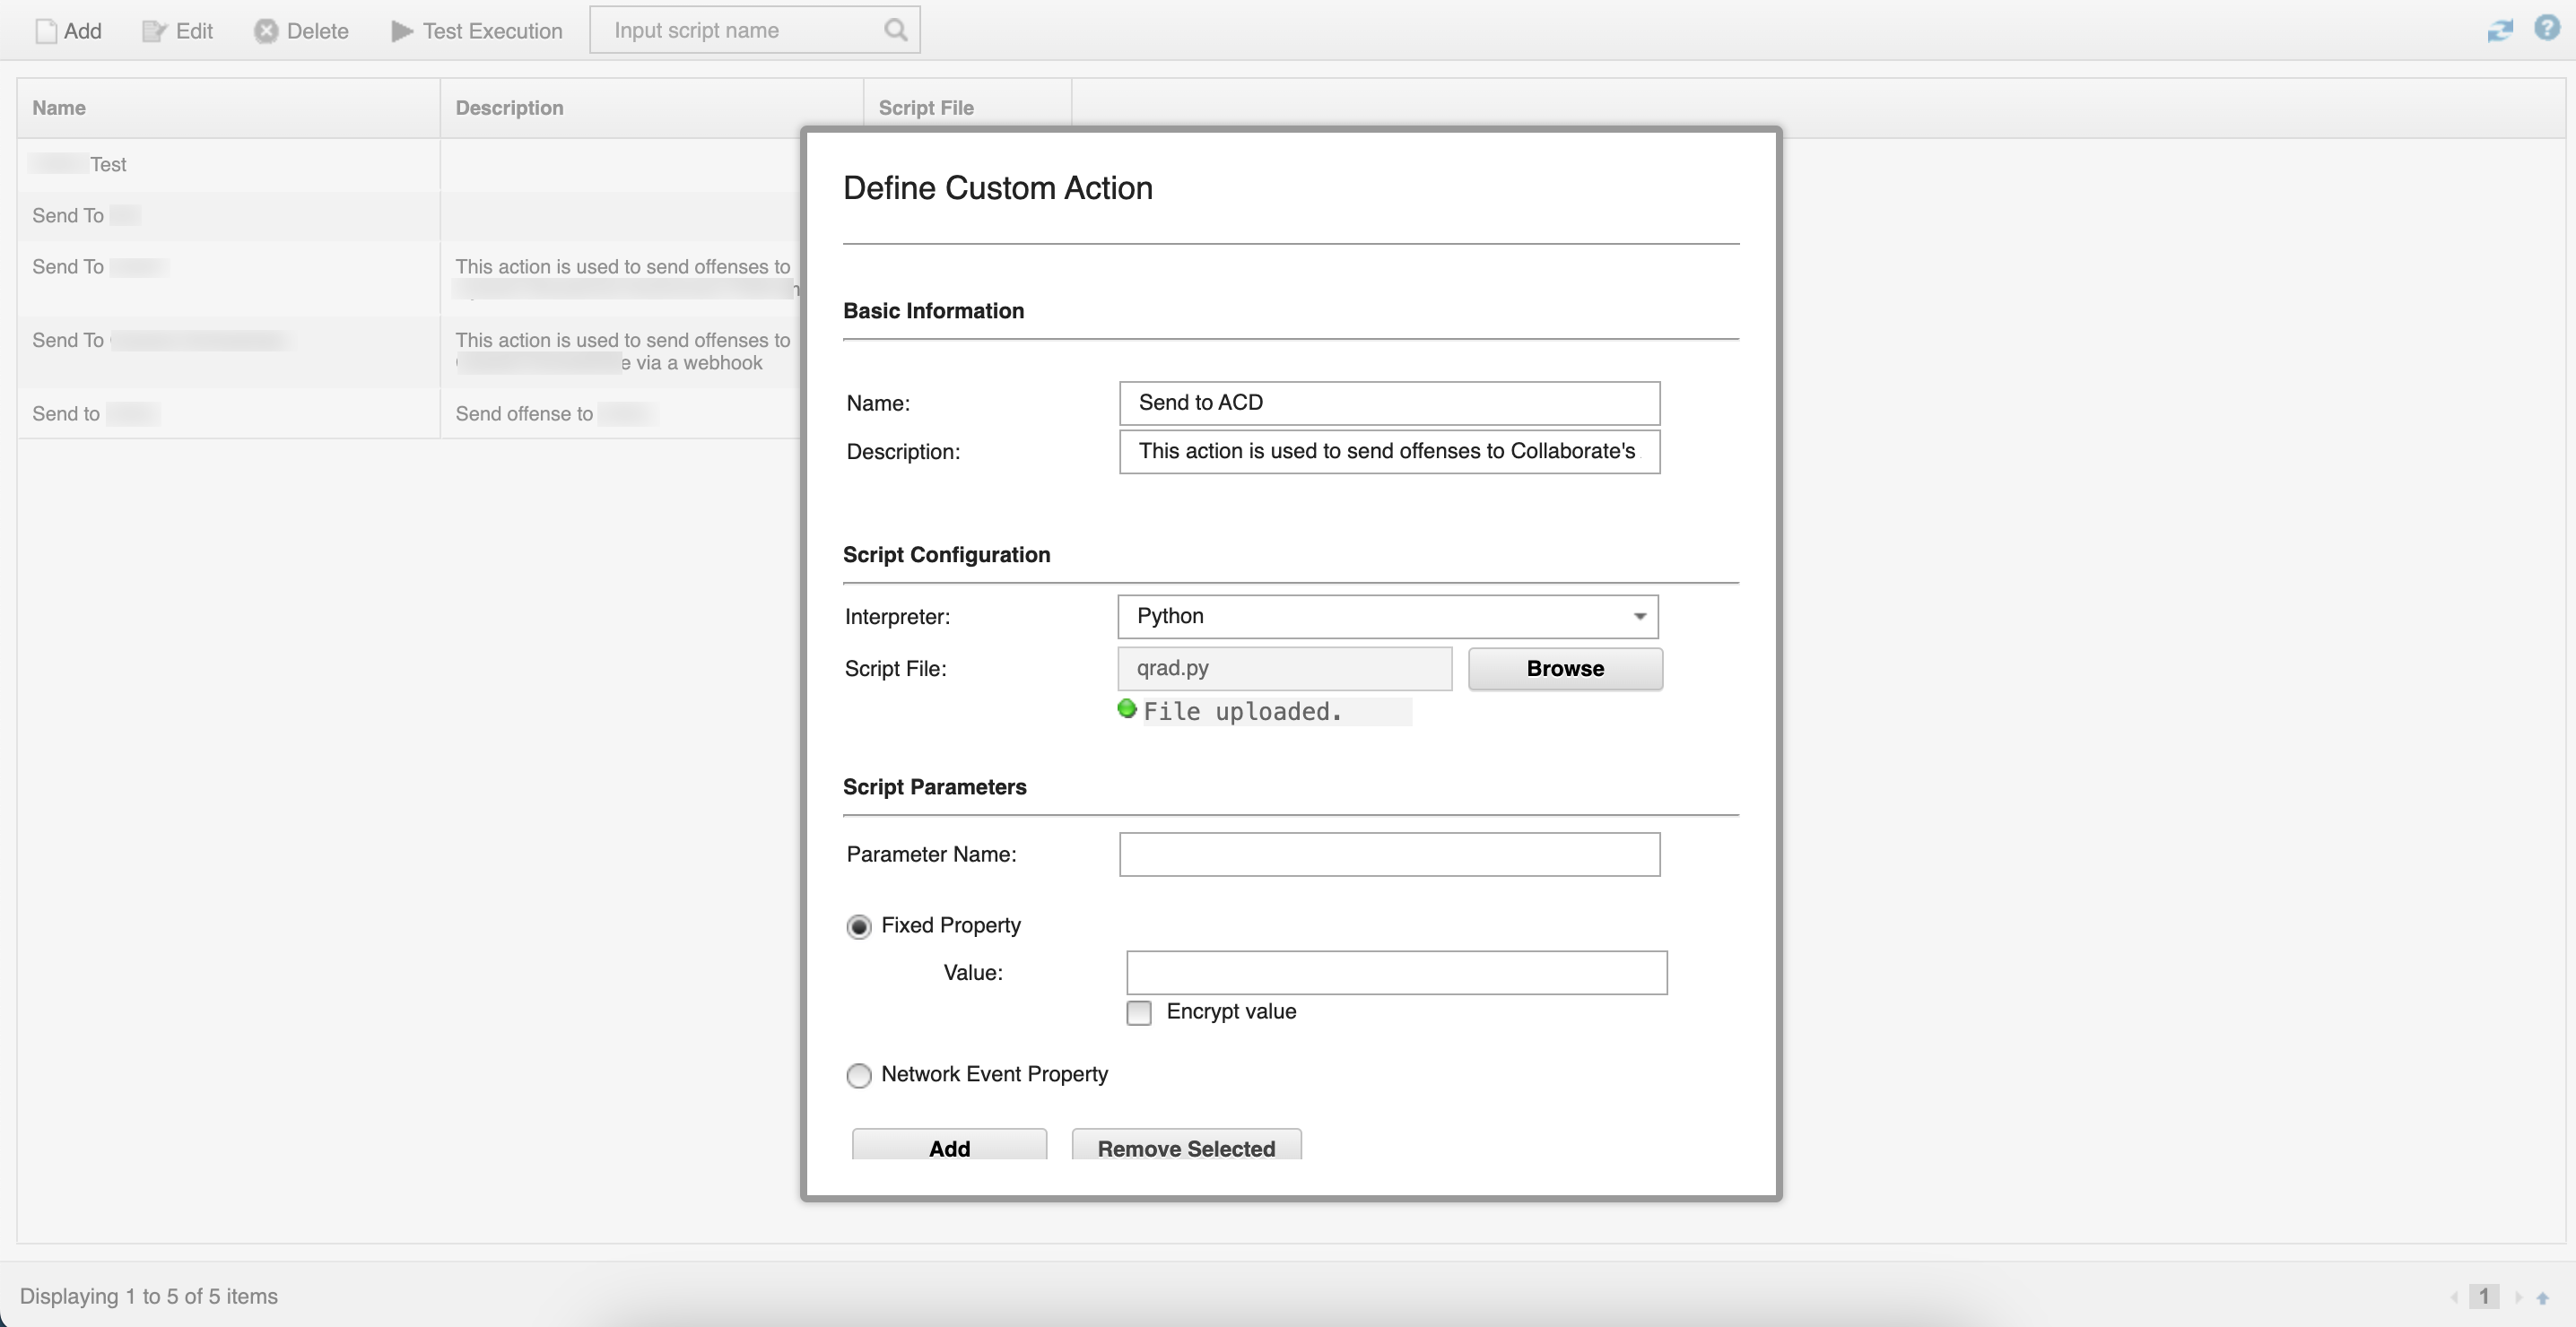
In Script Parameters, use the following information:
Fixed Property: After selecting Fixed Property, enter url in Parameter Name. In the Value field, enter the webhook that you generated in Collaborate. Click Add to add these details to the table.
Parameter Name
Value
url
Enter the webhook that you generated in Collaborate. For example, https://ingestion-01XXXXXX.spotio.your-domain.com/api/ingest/?token=0XXXXX00XXXXXXXXXXXX0XXX0X
Network Event Property: After selecting Network Property, add the following parameters and properties:
Parameter Name
Property
EventID
qid
Title
Title
Event Summary
Summary
severity
severity
sourceip
sourceip
category
qideventcategory
Event Time
starttime
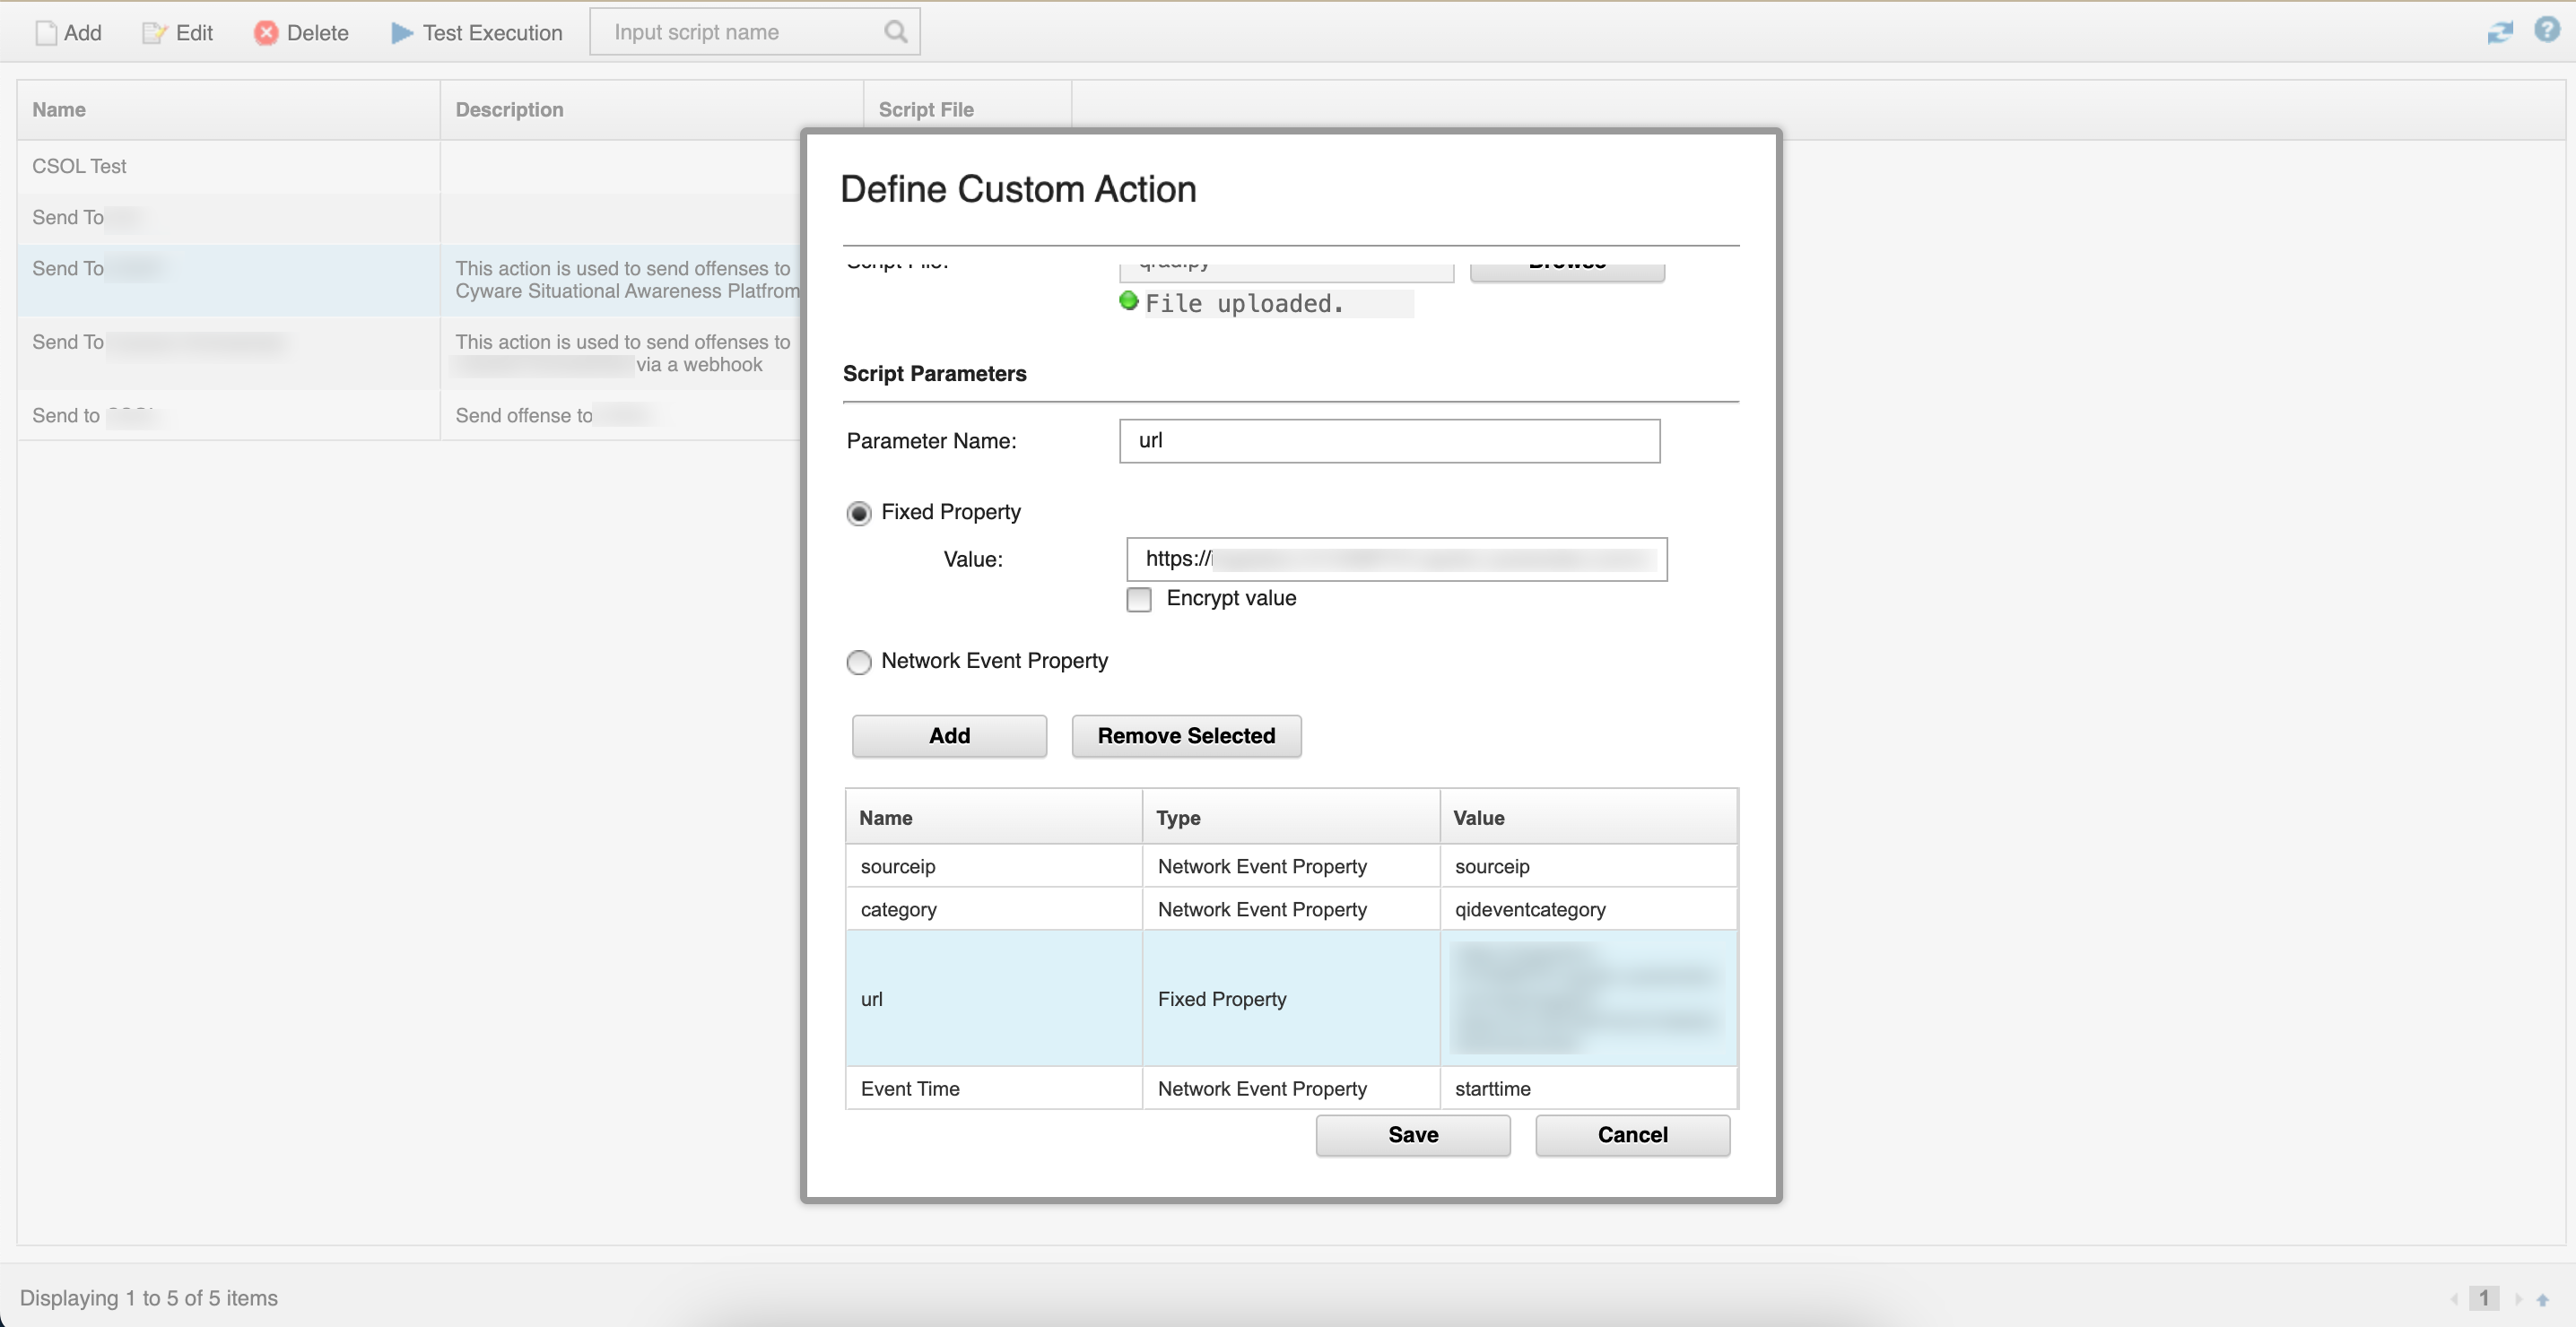
Click Save.
After creating the custom action, go to Offenses > Rules.
Double-click the rule to which you want to associate the custom action.
After the rule details are displayed, click Next.
In Rule Response, select Execute Custom Action and select the custom action you previously configured.
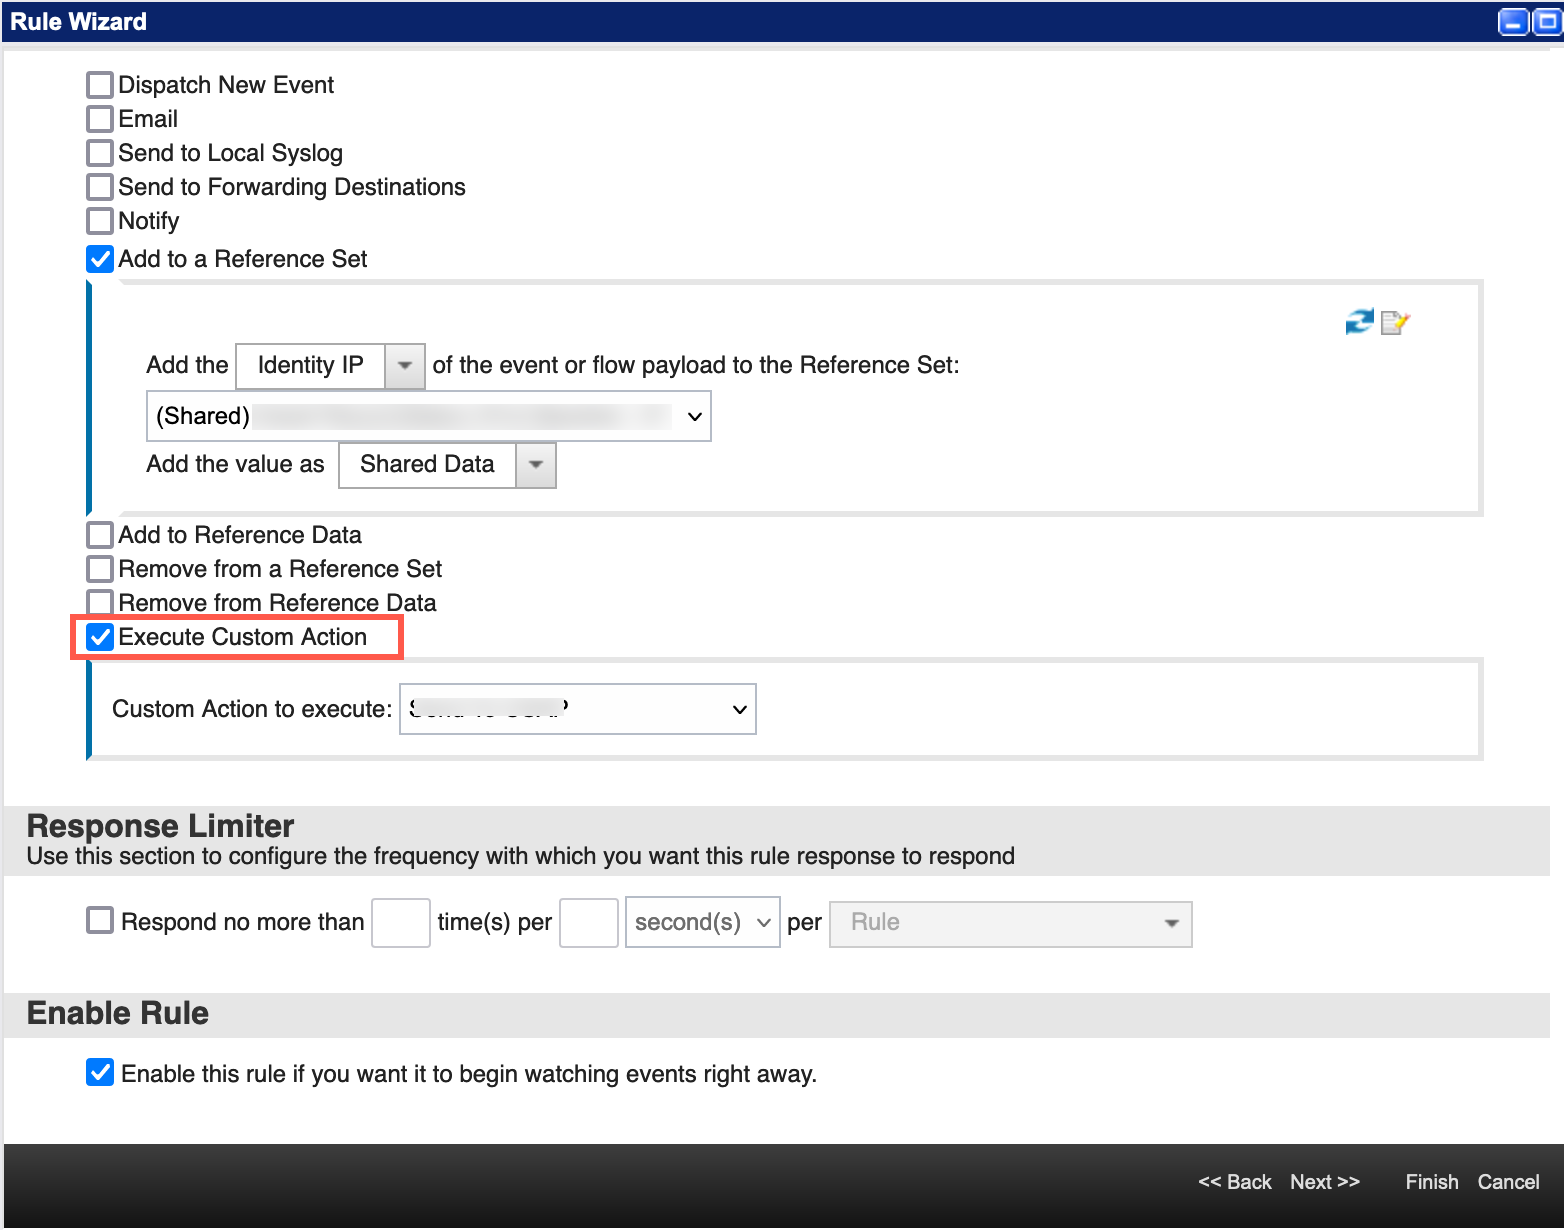
In Enable Rule, select Enable this rule if you want it to begin watching events right away.
Click Finish.
Results
You will now start receiving intel in Automated Collective Defense > Intel Repository > My Collection whenever this rule is triggered in IBM QRadar.